
Anyhow, I figured since I had a little bit of time today I would sit and upload some things to show you that I've done. :)
In this post I'll stick specifically to CARDS. I'll throw some of my scrapbook pages and paper bag albums up later in a different post.
I don't have a lot of time right now, so I'm just putting up a few things, but you'll get the general idea that I know how to make some cards (though I have to say my paper bag albums and scrapbook pages are WAY better! lol)
Some of these cards are more recent, except for the ATC greeting cards I made, which were done in 2009. I haven't made more of those types yet, but I should. hmmmmm something to do next month? ;)
I won't put the recipes for each card since I'm including so many cards in one post, but if you want to know what each card is made from, just let me know and I'll post a reply with the info. :)
Some of the pics really don't do the cards justice. I used something glittery or shiny on almost all cards, but my scanner isn't working all the time so I'm having to resort to taking pics. My lighting isn't the best for that either! haha.
So, here we go.... (Click READ MORE below)
YOU CAN CLICK ANY CARD FOR A BIGGER PIC
-----------------------
This is a card I made for a challenge in the scrapbook group I was in. I LOVE this card! Hubby actually liked this particular card so much that I still have it. it's on my wall by my scrap area. :) I made several cards with this same image but this is the one I like the best.

-----------------------------
Here is another card with the same kitty image. on the oval behind the kitty, I used an embossing folder and embossed flowers on it. I put pink pearl ex on the raised parts of the flower. It doesn't look like it though, and it also doesn't look like the blue oval and the pink flower the kitty is holding matches the color of the dots and flowers of the paper, but it all matches PERFECTLY when you're holding the card :)

------------------------------
This is a card I made for one of the queen of the month's in ScrapbookPlace. Originally this card had a different crown on it, because I used the stamp to just stamp it on her head. But, I wasn't thinking and stamped the whole stamp even the bottom part of the crown (that should have been "behind" the head) so I had to take that whole card apart and start from scratch. since I had already colored the image with my prisma's and gamsol I had to recolor another image. I kept the colors the same though and instead of stamping the crown, I stamped it in versamark and heat embossed it in silver judikins embossing tinsel. :)

----------------------------------
This card I made for hubby for valentines day. I know, not much of a lovey dovey card, but I thought it was CUTE! I made up a sentiment in microsoft word and put it inside the card. The background is red cardstock with silver GLIMMER MIST, of course, my own homemade kind :)


------------
I did another card similar to this one, well ok, basically the same just different colors and I did a different sentiment inside. :) for this card and the one above, I used "flock" on the hearts on the bulb. for the bottom part of the bulb I used silver embossing tinsel. I went a little heavy handed on this one, on accident, but it was too late to go back! LOL on the background, just a light purple with glimmer mist.


------------------------
This is a thanks card I made. The background is actually a very light PURPLE to match the purple that I colored tilda's flowers in. But, with spring around the corner, I wanted her to be wearing some bright clothes so I went with neon colors. I gave her bright red hair and colored the dots on her face like freckles.
I was originally going to mat the image on the blue, green, orange and then RED to match her hair, but the red wouldn't fit and still be able to see the swirls on the background paper so I decided to scrap that idea (get it, scrap? haha!) and just distress the sentiment in red instead which actually worked out perfectly. :)
For the bow, that was a miracle! it is the first bow I've EVER tied perfectly on the first try, and I still have no clue how I got it to work so great. If I couldn't get it the first time I was going to end up trying the fork bow method, which now I know, wouldn't have worked because I don't have big enough forks and the bows come out too small. The ribbon was just a piece of "scrap" ribbon that I had in the bottom of a baggy of ribbon. the colors, off the computer screen, match her clothes and the paper colors exactly! can't tell a difference at all. :)

-------------------------------
Isn't this little fluffy gal the cutest? I made her edges darker just to give some better shading and make her look more realistic. The fiber on the tag matches the background paper really well. The white background paper is some cardstock I got from a friend that is embossed with some awesome looking flowers. Wish I knew the company that made this paper, I LOVE the flowers. they should make an embossing folder like this type of flower :)

--------------------------------
This is just a quick thank you card I threw together with some card candy I got from a friend. The "thanks so much" is the card candy that was already completed. (Thanks Laura M.) The big flower I put on it is layered with 4 flowers, two to match the orange and brown and two to match the background paper better. Sometimes I just need a quick and simple card to throw together and get out in the mail quickly. I'm ALWAYS looking for these types of small card candies to make quick and easy cards with, if you have extra, let me know we can work out some sort of trade :)

--------------------------
I am REALLY pleased with how this card turned out, well for the most part anyways! I used the "bouncing brayer" technique to get the look that is the blue in the background. I decided I wanted it to look like the music notes and stars were "flying" so I concentrated them more towards the outside. I double stamped some of the images to make them look like they were "moving" or twisting or scooting along.
The only problem I have with this card is that because I didn't have any dye ink, I tried it with pigment ink. I will say, this does NOT work well with pigment ink! I am going to have to take this card apart and cover it in embossing glue with my brayer and then heat emboss the whole front in clear embossing powder to keep the images and background from smudging. Now that I have a couple colors of dye ink, I'll do another version of this card and see how it turns out, but I'm sure it will be MUCH better!

--------------------------------
This is a card for my mother in law. My 14 year old nephew (in-law) colored this card with water colored pencils and then used the aqua brush on it. I did my own image and he did this one, and I showed him how to do the shading. He did an awesome job! He did everything on this card except for the stacking and the actual assembly. He even used the sizzix to emboss the background paper and I showed him on my own image how to use the cats eye pads to do the distressing around the edges. Isn't his bow great too? and let me tell you, he had a BLAST with the stickles. UGH!! can't give that boy glitter he'll paint the whole house with it! LOL

-----------------------------
This was another card I made for one of the queens of the month at Scrapbook Place. the coloring took me a little while but it took me even longer to find paper to match and thankfully, I had paper which I found AFTER I colored the image. Let me tell you, I have now started to find paper for my cards BEFORE coloring the images! LOL the thing I like most about this card is the owl's eyes! :) I did the sentiment in microsoft word next to the digi stamp and printed it all at the same time. The hearts on the crown are silver heart brads. they weren't the right color so I blotted them on my big and embossy pad and dunked them in silver embossing tinsel and heated them puppies up! they came out nice. :)

----------------------------
So, instead of buying glimmer mist, I MAKE my own. I have a pretty good recipe and for the cost of ONE bottle of glimmer mist I can make 3 colors of my own, sometimes 4 if there is a good sale. :)
So, here is my take on mixing two colors of my homemade glimmer mist on WHITE cardstock.


Now, here is the finished card :) Isn't it ADORABLE? I used glossy accents on the lady bug and in real life the card is all shiny :) very cute! Also, a note, when I do my glimmer misting on a card front that I know is going to be dry embossed, I always do the glimmer misting FIRST and let it dry and then do the embossing folder. I do this so that when I want a good coat and no white showing in the background, it's a good way to make sure that i don't miss anything! In person this card is SO vibrant and shiny!

----------------------------
So, this card was a REAL challenge for me! for some reason, I did NOT want this card to turn out childish, but I jsut knew for some reason that it would, and it did end up that way :( I even told hubby before I made it, I am going to have a hard time with this. I have not used this lion again in another card because of the fact that I'm pretty sure it will turn out childish. Maybe this just isn't the right image for me! I just made the sentiment in microsoft word on white cardstock, distressed the edges and used a smaller piece of the same mat for the tag background. I just punched a small hole and fed the fiber through.

---------------------------------
Here's another thanks card with some completed card candy from Laura. Well sorta! the stamped image and the little square of paper it's mounted on from her. I had to take some of the other decoration off to make it what i needed it to be to match this card. I added a new ribbon (brown), some skittles and a big white bow. My parents and my grandma recently helped hubby and I out in a big way and I needed a LOVING thank you card. I thought grandma would like this. :)
I made the flowered border strip out of some left over bazzill cardstock scraps and I used my versamark pad and some white embossing powder. it turned out really nice. I layered a few primas and topped them with a gem brad.

----------------------------------
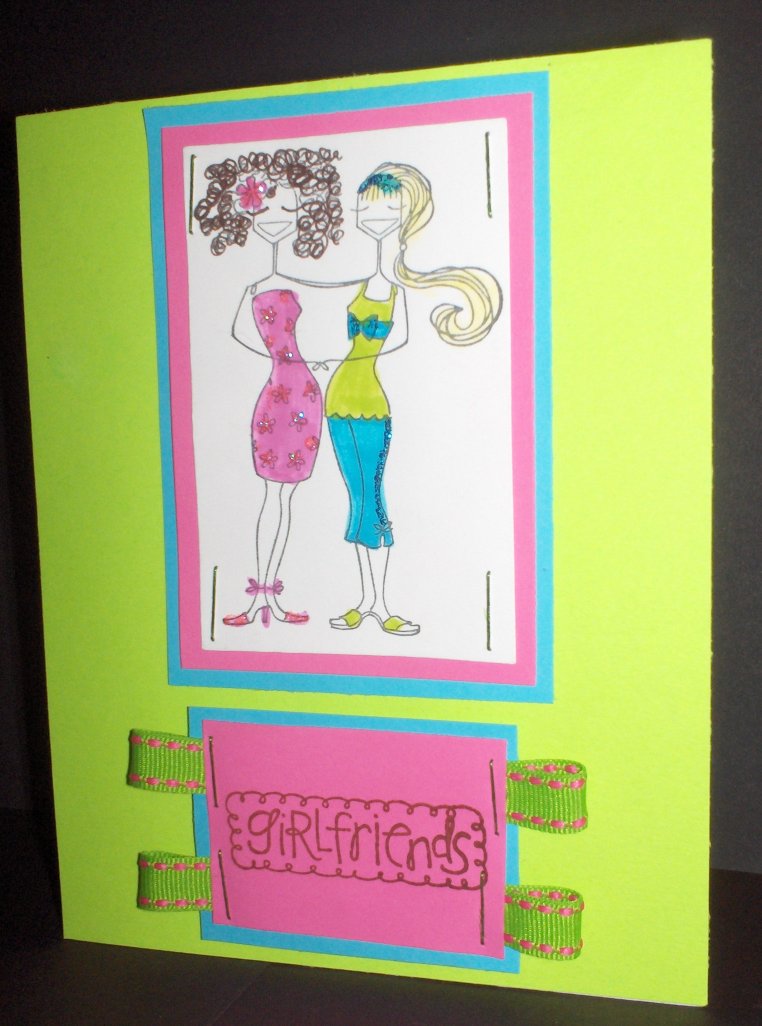
Spring is just around the corner, and I made this card a few days after the tilda neon card. I messed up on the sentiment and had to start over. I ACCIDENTALLY grabbed the pink cardstock I was going to use to mount the image on and cut it down small so I could stamp a new sentiment (the first time I dropped the acrylic block and it made a 2nd partial image). Well I smacked myself on the forehead and then had a cow. well, not really, but almost!!! I did freak out quite a bit. I was rummaging through drawers and paper packages trying to find some more pink neon cs and I didn't have any!! I freaked out even more. I don't usually use neon colors, in fact I pretty much HATE them, but I was given a pack for christmas so I figured I could make use of it somehow. Well I finally found a "small" piece of scraps, enough to make a new square for mounting the image and yet another (3rd) sentiment since the new piece of scrap paper I found didn't quite match in color to the one I had previously. lol So this is the result after about 30 minutes of freaking out not knowing what to do and thinking I'd have to scrap the card all together.
I used green staples to put everything together on the image and the sentiment and the ribbon is cute too! I used pink stickles on the flower in her hair and on each flower on her dress and on her shoes. I used blue stickles down the leg of the capri pants, the bow on the shirt and her headband :)
----------------------------
Here's a cute free digi image that I used for a birthday card for my girlfriend. She LOVES frogs of all kinds so I thought this was cute. I did the sentiment in microsoft word and used cute little froggy eyelets to hold it together on the strip piece of paper for the background.
there is a clip on the top right of the card that says "celebrate" in alternating blue and green letters. :)
--------------------------------------------------------------------------
Well, I hope that you have liked some of my cards. I will stop here in this post for now, but I'll make another new post sometime this week with some of my mini ATC greeting cards that I make, and then I'll also make a post with my scrapbook pages and my paper bag albums (I have LOTS).
Keep on Scrappin' :) and be kind to one another.
~Melisa Marie
OMG Melisa you have been busy thanks for becoming a follower on my blog there is somethinh for you on it now pop over to collect it
ReplyDeleteJacki xx