

Showing posts with label prismacolor pencils. Show all posts
Showing posts with label prismacolor pencils. Show all posts
Tuesday, February 25, 2025
Friday, April 3, 2020
Bay window Birthday card
This is a really cute and unique card! My SU! demo sends out a Make & Take each month and it's always a different kind of folding, cool card. For this one I went with colors that are my friends favs and I think I turned out nicely. I am totally in love with this fold though, something I will be doing in the future.
This card actually has "magic". LOL, no really, just a tabbed sentiment, but it makes the card have a magic fold!

This is the inside of the card and the far right edge... I added my own sentiment into the inside of the card for when it's open fully.

When folded, this is how the tab on the inside makes a "Bay Window" effect. It's so pretty.

And this is what the folded card looks like from the top.

I colored the card using my SU! blending marker and some of my SU! ink pads for the coloring. I used the friendship bracelet floss string to make the bow.
Well, that's all for this card, be sure to come back soon to see more cards I've made. I have been a busy bee!!!
~Melisa Marie
Such Gorjuss Girls!
For these couple female themed cards I used the Santoro Gorjuss Girls stamps. I made 5 cards using 3 of the stamp sets I have. I definitely want to get more of these sets because the girls are just adorable!
Here's one card, click below to see the rest...
For this card I used my SU! Doily Die, I thought it would just give this card a little extra love in femininity, I cut it out on white cardstock and then used my felt tool to ink it with a burgundy color. I used 1 small flower and then added 3 mini flowers to complete the cluster. I cut 2 decorative cardstock pieces to layer behind the top layer that she is stamped in. I added 3 pearls, and on the gal, I gave her cute rosy cheeks and a small smile. I covered her eyes and all the hearts and puddle in glossy accents to give it a clear shimmer.

Thursday, April 2, 2020
Little Geisha Girls
Oh my! Have I got some of the most adorable little Geisha Girl cards for you. I am so pleased at how these turned out! 10 little cutie cards made...
Angels watching over
Angels are beautiful, amazing and a comfort for many people who feel angels are watching over them. Here I've made 10 angel cards. They came out as beautiful as I think angels are!
sneak peek of inside, click below for the rest

sneak peek of inside, click below for the rest

Wednesday, September 11, 2019
Sending Showers of Love and Smiles Across the Miles
Hey y'all! Today I have 2 cards to share. Most of my followers know, I do NOT duplicate cards. I do however, often times replicate the layout of a card because I liked my original layout of another card.
That's what I have here today. The layout used on these 2 cards are the same layouts on a card that I made back in 2017. I used one of the Santoro Gorjuss Girls stamps I have.
One is for my baby sister who I miss dearly everyday, and the other is for mine and hubby's best friend Jenn, who recently lost her dad (and lost her mom last year). We called them Mom and Dad because they were like 2nd parents to hubby and I. It really sucks that they are both gone. Jenn is more than a friend to us, she is family for sure! I call her my sister or Butthead (I'm Bevis) LOL.
And Please always say "I love you" before leaving the house because just never know when your hug or kiss will be your last.
Anyhow, click below to see the cards.
Friday, March 15, 2019
I was an ASS and CASE'd a Birthday card!
I was an ASS, I CASE'd a card and busted my ass doing it! HAHA!
Not really, but I just got this ADORABLE, funny, punny stamp set and I had to bust it open and get it inked up to make for mine and Hubby's 2nd dad, our best friends dad who we call Papa Mike.
Here is a preview of the card, click the link below to see the rest...

Not really, but I just got this ADORABLE, funny, punny stamp set and I had to bust it open and get it inked up to make for mine and Hubby's 2nd dad, our best friends dad who we call Papa Mike.
Here is a preview of the card, click the link below to see the rest...

Wednesday, February 13, 2019
A Card for a "Dear Friend"
Hey there crafters! WHEWWWWWWWW!!! I know it's been a very long while since I've been here with a CRAFTY update for y'all, but life has been very hectic and a lot of health issues going on for both Hubby Hazen and I and I honestly haven't had any time to craft.
But, this past week I've been a busy crafty chick! I've managed to get 7 cards done done this past weekend along with 13 Valentine's flat double sided cards for mine and hubby's nephew's, great niece and great nephew and our grand babies (ohhhhhhh------YES!!! That's a whole other post all for itself--watch for a "Life Event" post to come shortly! GREAT NEWS!!!!!). On top of that, I managed to get over 80 images stamped and 30 die cuts done for swaps in a few crafting groups! YEP, I told ya I've been a busy crafty chick!!!
Anyhow, on to THIS CARD! A dear friend of mine recently gave us the news that, after a few years of continuous respiratory issues and several battles with pneumonia, she's just been diagnosed with Stage 4 lung cancer. This was very difficult news for me to hear as last year I lost another very dear friend to Cystic Fibrosis. That wasn't so difficult because she was in Hospice and we knew it was coming, but to hear about this dear friend of mine being given this horrible news I was very upset. I think it's more upsetting because she has been dealing with respiratory issues for the last 2 years or so and with as many x-rays, ct's etc. that she's had, they really should have caught it before now. But, her doctor did tell her that with it being stage 4, she still has a lot of long years ahead of her with the proper treatment! I was SO glad to hear this. So, to brighten her spirit I wanted to make her a card that showed her how much her friendship means to me. The card came out really cute, it's a card that I've made a version of in the past, I just changed a few things and added a couple other details and used one of my favorite "friendship" quotes on the inside.
So, click below to see the card!
Saturday, February 6, 2016
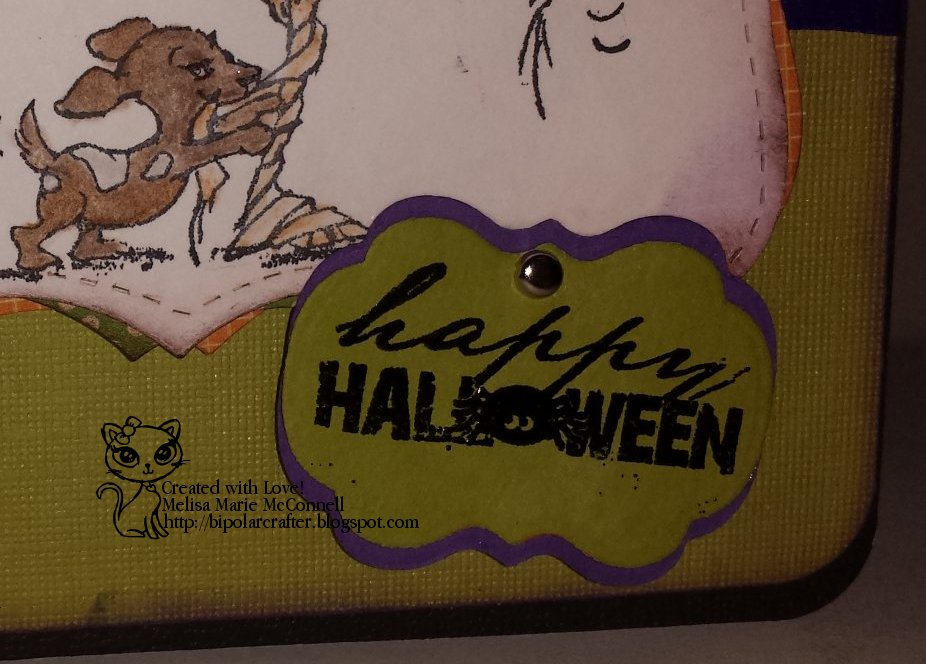
Almost Caught Up! 2 Halloween Cards
Hi again! I'm back with another update, still catching up on my Halloween card posts. I have 2 Halloween cards to show you here, and then I only have 1 Halloween card left, and can move on to my couple of Thanksgiving and Christmas card posts.
Whewwww, I've gotten a lot of my blog posts done over the last couple days. I hope you like everything I've shared with you.
Check out the previews for these 2 cards and then click below to see the rest of the details and the pics!
Card # 1 Preview

Card # 2 Preview

Whewwww, I've gotten a lot of my blog posts done over the last couple days. I hope you like everything I've shared with you.
Check out the previews for these 2 cards and then click below to see the rest of the details and the pics!
Card # 1 Preview

Card # 2 Preview

Friday, February 5, 2016
Some More Catch Up-2 GREAT Halloween Cards!
Hey there! I'm here to show you 2 more Halloween cards that I made. One was for my nephew, it was his 1st Halloween! And the other was for his mama and daddy (my brother and his wife, my fav. SIL).
Here are some previews, click below to see the full details and pics.
Card # 1 Preview
 Card # 2 Preview

Here are some previews, click below to see the full details and pics.
Card # 1 Preview

Thursday, February 4, 2016
Still Catching Up-2 More Halloween Cards
Hi! I'm still working hard to catch up on my posts, I'm here to show you 2 more Halloween cards that I made. Check out the previews and then click below to see the details and rest of the pics!
Card # 1 Preview
 Card # 2 Preview

Card # 1 Preview


Catching up some more...3 Halloween Cards
Hiya! I'm doing an awesome job on getting my blog updated with past craft projects that I just didn't have time to post when I did them. I'm still quite a bit behind, but I'm getting a lot done, very fast. I'm trying hard to get my Halloween projects posted so I can move on to posting my Christmas projects!
Today, I have 3 cards to show you, all from last Halloween. The cards were for the 3 kids of a friend of ours in Kentucky. The kids loved the cards, they never get anything special like this for Holidays (i.e. no handmade cards). It was a nice surprise for them!
Here are 3 sneak peeks, click below to see the rest of the pics!
Card # 1 Preview

Card # 2 Preview

Card # 3 Preview

Playing Catch-Up...More Halloween
Hey! I'm still playing catch-up on my project postings, so here are 2 more Halloween cards! I ended up making a LOT of Halloween cards. Halloween is mine and hubby's FAVORITE holiday, so I always make the cards and hand them out and mail them to friends afar. Last year was no exception, and I really out did myself!! But, I had a blast.
I'm sorry I'm so behind, life just really got in the way. But, check out these previews of my 2 cards and then click below to see the rest of the pics!!
Card Preview # 1
 Card Preview # 2

I'm sorry I'm so behind, life just really got in the way. But, check out these previews of my 2 cards and then click below to see the rest of the pics!!
Card Preview # 1


Still Catching Up...Sharing more Halloween Cards
Hi there! I'm still trying to play catch up on all the blog posts that I'm behind on. Here are 2 more Halloween cards that I had made.
Sneak Previews, click below to see the full pics!
Card 1 preview:
 Card 2 preview:

Sneak Previews, click below to see the full pics!
Card 1 preview:


Tuesday, December 29, 2015
Thank You Friend-A Card
Here is another card I made by coloring an image another friend sent me. I had a real tough time with this card. I really do NOT like the image, but had to come up with some sort of layout for a card wtih it.
Hope you like it better than I do! Here is a preview, click below to see the rest.
I like how I did the ribbon in the bottom corner of the card... my favorite part of the card, really.

Hope you like it better than I do! Here is a preview, click below to see the rest.
I like how I did the ribbon in the bottom corner of the card... my favorite part of the card, really.

Saturday, December 5, 2015
Altered Tags for 2 friends
I love working with tags, though I don't do it enough! I really should do it more, because I've come up with some really cute designs.
I recently made 2 tags for 2 friends. One friend had just lost her dad and another had just lost her brother.
Here are the 2 tags I made. Same design layout, but different colors on the coloring of the flower and the ribbon stuff.
This tag is for our friend D. She isn't really into girly things so I went with some pretty neutral colors.
I started out by stamping the flower in SU! Tempting turquoise, I then used my prismacolored pencils and colored the flower yellow. I did some shading with orange.

I fussy cut the flower out and added it to the tag with some 3d foam pop dots.

I used 2 different ribbon and 2 different fuzzy ribbons. I love they all look together!

I made some little flags and attached them with 3 staples. I've started to love using staples as a great embellishment.

This is what the back looks like...I added notes that I hand wrote to each of the Ladies. I attached them with a paper clip that I dyed with my Ranger alcohol inks.

~~~~~~~~~~~~~~~~~~~~~~~~~~~~~~~~~~~~~~~~~~~~~~~~~
Here is the card that I made for my Ladybug G. She is quite a bit more girly than D., so I made her with some different and girly colors.
For this one I used teal and pink for the flower that I colored, as well as for the ribbon.

I used more teal and pink with a splash of yellow for the tag

again, added a note with a paper clip that I dyed.

Well, that's my 2 altered tags. I think they came out very lovely. :)
Come back soon to check out more of my projects.
Keep on Craftin'
~Melisa Marie
Thanksgiving...Has come and gone, but here are a few cards
I made a few different Thanksgiving cards. I usually don't duplicate card layouts, but after finishing the first one, I really liked how it turned out, so I made a few more like it, just with different colors.
Here are a few previews, click below to see the rest of the pics.


Here are a few previews, click below to see the rest of the pics.


Saturday, February 28, 2015
Best Girlfriends B-day!
My GF just had a birthday, and I made this "Faux Card" for her! It's something I've wanted to try for a long time, I've never seen it done before, so I figured now was as good a time as any because I knew I wanted to create a cute little 'scene' for her to enjoy. I figured she could put this on her desk at work, or hang on the wall, or whatever.
Instead of making it an "open and close" card, I made it a "faux card" and instead of having an inside she will just pull the tag out from between the front and middle layers of the scene. It came out SO freakin' cute and MUCH better than I expected.
Here's a sneak peek, click below to see the rest of the pics!
**NOTE: This is a VERY image heavy post, so if you don't have high speed internet, or you're viewing from a cell phone or tablet, pics may take a few moments to load, so please be patient!
Wednesday, February 18, 2015
WOOD you still be mine? A cute beaver Valentine!
I had a lot of fun making this Valentine's Day card for my hubby! Though I was having a very difficult time with my bipolar at the time I was working on this card, I put my mind to it and I got this done!
It's sometimes difficult making "cute" cards for my hubby that don't turn out 'girly'. I know a lot of my card making friends have this same problem. I actually had to turn to my card making friends in one of my Facebook groups to get help with the colors for this card. Thankfully, several of the ladies threw out the same color suggestions of red and yellow or red and gold.
That helped me greatly in picking the papers for this card. I originally had teal, rose pink and brown picked out. ICK! I'm so glad my friends were able to help me out in the color selection.
Anyhow, I got to use this CUTE beaver stamp that I have to make hubby's card, and I added a lot of other cute elements to make the card complete, including getting to use my new sewing machine that I got for Christmas, to sew some borders on the card (inside and out).
Here's a sneak peek at the card, click below to see the rest of the pics.
Monday, December 22, 2014
Double double toil and trouble-Fire burn and caldron bubble.
I'm continuing the posts of my Halloween cards, and I am trying to put more than one card per post. 20 Halloween cards is a LOT!

Here are are 2 beautiful witch cards that I made!!
Here is a sneak peek, click below to see the full pics.
Subscribe to:
Posts (Atom)