So, one album that received a lot of attention at last years craft fair was my red hat album. My mom said after it sold, many people were asking if I did custom albums or could make more. So, I decided to make another red hat album for this upcoming craft fair. I hope that it sells and that the red hatters in this area spread the word to their sisters that I can make custom albums.
I hope that you enjoy looking at my pics, and keep in mind, I do fulfill custom orders! :)
Here is the album I finished last week...
I layered a dotted prima flower on top of a velvet recollections flower (I think it was recollections!) and then added a smaller prima flower on top of those with a recollections gem brad. I added a red hat glossy 3d sticker to the middle with some glossy accents for a good strong hold. the hat is actually a VERY heavy beautiful broach. I attached some felt to the back of it on the pin, I glossy accented the pin closed (for a good hold, I don't think that pin will ever come open!) and then I glossy accented and hot glued it to the cover (just for extra strong hold, lol) I added 2 purple prima pearls to the covers top and bottom corner.

This is the first page, the inside cover. Since the bag was folded over with it's bottom flap, I used that to my advantage to create a pocket. I used 2 star brads to hold the 2 pieces of the bag flaps together at the top and bottom and slid a tag in there. I cut the tags with my cricut cartridge, the george and basic shapes cart. I added 2 prima pearls to the top and bottom so they weren't so bare. On the tag I added a double layered prima flower and put some different fibers on it.
This is the front of the tag.
and this is the back of the tag... I covered the front and back in the red hat deco paper and then on the back I stamped a journal image so it can be written on. I used one of the stamps from the Paper Company Studios clear journaling stamp set. You'll see that I've used this set throughout this book...
This page is just left bare... I did NOT put any photo mats anywhere in this book... the reason for this is because I'm going to include purple, white and pink photo corners with the book (in a separate baggy). This way, instead of me saying your photos must conform this size, they can just add the corners to their pics and make them whatever size they want to fit the pages... either a single pic or multiple pics. :)
On this page I used my fiskars double corner embosser and puncher. You smash it first and it punches the corner, then you smash it again and it embosses. I added some tiny gems with glossy accents to the center of each embossed corner and tied a ribbon around the bottom.

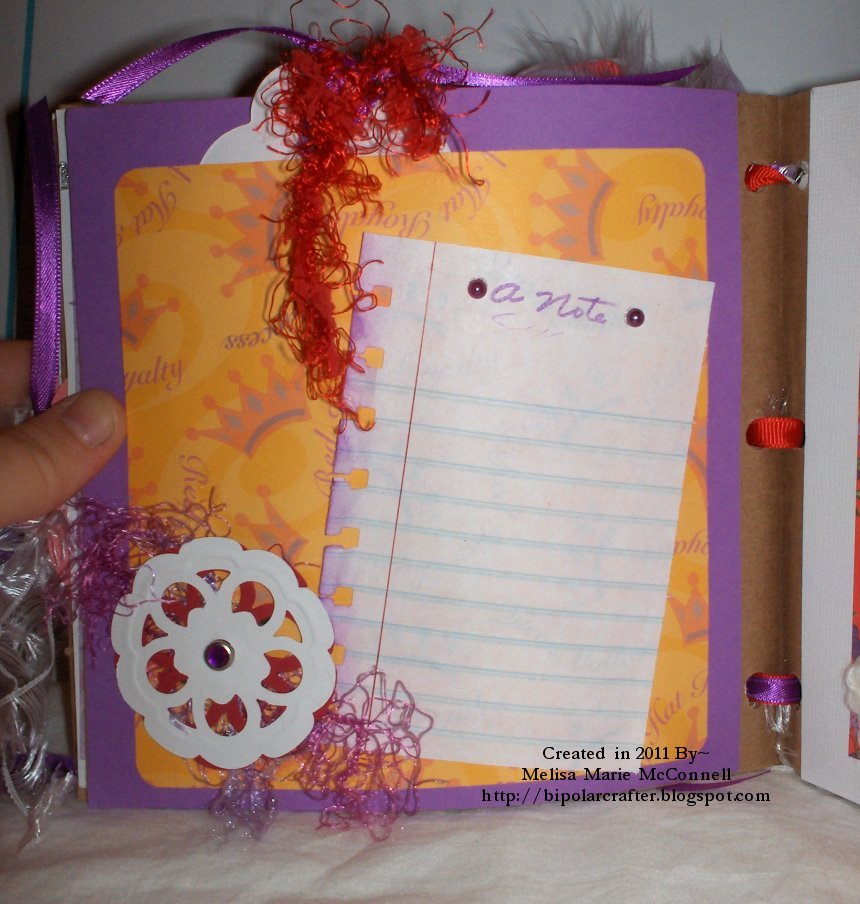
This is one of my FAVORITE pages!! I actually made 2 like this in the album. this is a hidden tag page... if you notice, at the top of the page, there is a tag sticking out. the best way to do this is to attach the paper/cardstock all the way around the book, except for at the top. that leaves room for the tag to slide in and out easily. I used my stampin up spiral bound punch to punch the edge of a plain sheet of binder paper which I cut right at the top left portion of the page... I cut off the binder circles and then punched it. I inked the edges to give it some pop off the page. I used a small studio g stamp to stamp a note... the stamp says "a note to say hi" but I only inked the part of the stamp that said "a note". I added 2 mini prima pearls on either side. I added 2 silk flowers with red ribbon behind them and a brad. I think this page turned out nice!
Here is the hidden tag!
I stamped the sentiment and red heart border from the CTMH true friends stamp set. the flourish border is from another stamp set I have, I can't find the package right now (my craft room is a MESS).
This is a double sided tag! did the other side in the paper company studio journal tag that way the owner can write whatever they want :)
This is another favorite page! this page had a small flap too... so instead of closing that flap down I decided to use it as a flipper page. I added a 3d glossy sticker with glossy accents (for that super strong hold). I added a tab from the stampin' up tab punch and wrote "flip over" on both sides of the tab in my white jelly pen that my BFF
Leslie sent me.
I did 2 different sheets on the inside of the page to mix it up. On the left I used a small piece of border punched cardstock that I got from a goody bag from my friend
Donna. As a notice, Donna is the one that gave me the majority of the red hat stuff that I used for this Album. My friend Mary also gave me quite a bit of red hat stuff as well, but the majority of it was used for the other album I had made.
So, on this page I used a sentiment at the top from one of my Colorbok punch out paper packs. I matted that on some border punched cardstock with some white brads. In the bottom left I tied 2 tags together from my colorbok punch out paper pack. the top one says joy and the bottom one is blank for writing. these 2 tags with their cute fiber fit snugly into the mini pocket that I created with the border punched cardstock.
The next page is a "hat" page. this will be a fabulous page to add a picture to with sisters in their glorious hats! some wired fiber, tulle, some feathers from my purple feather boa (I keep small feather boas around for my cat to play with... this was an extra piece I had cut off and kept in my drawer for craft use) and a crocheted flower with a brad looks like a NICE piece that you'd find on a beautiful red hatter's hat! So I thought it would make a nice addition to the page. :)
There is a tag in the side... I thought the sticker fit well for a hat page. :)
This tag is also double sided... front...
back... I stamped this with one of the borders from the CTMH true friends set. it can be written on.
on this page here I was trying NOT to be greedy!!! I LOVED this butterfly paper and was going to keep it for myself but decided to use it to give something extra to the page. I created a "faux bow" by simply gluing some ribbon together in a loop, gluing another small piece around the middle of that loop and then folding and gluing 1 larger, longer piece behind them to create the wings for the bow. I did one small strip of ribbon across the top of the page and used a zot to glue the bow on the middle.
for the bottom I used a border stamp and stamped the image in cranberry crisp SU ink. not shown in the picture I used silver stickles in the middle of each of the circles for the stamped sentiment to really tie the sentiment into the page and give the bottom of the page some pop. :)
The next page is another flipper page. These are CUTE!! I used 2 diecut purses for the purse at the top. I cut the top off a red purse and glued it to the top of a purple purse so it was 2 tone. I used my white jelly pen to outline the purse. I put some bakers twine around a heart button and used glossy accents to adhere it to the purse. 3 nice layered flowers (recollections and primas) with a recollections red gem brad in the bottom corner makes the page not be so plain.
On the inside of the flipper I just decorated the right side with a small border punched cardstock. I didn't add any tags to this page.
On the next page I created another "note" page with a hidden tag. For the flower I used 2 pieces of the flower that I punched from my marvy-silhouette embossing spring flower punch. It is a nice size, 4--3-4 x 4--1-2 x 3--1-2. I just lined them up perfectly and then spun them so that they were alternating. I added a ribbon loop of fiber behind it. Again created a piece of note paper from binder paper with my SU spiral bind punch.
The hidden Tag...
side 1 of the tag...
back side of the tag...
Here is the next page. I used a 3d glossy sticker, adhered it to a white textured cardstock scrap with glossy accents and then cut around it with a little extra border to make a larger tag. I initially wanted to have the tag slide under the ribbon but I was so tired after working on this book for so long that when I ran the ribbon through my X xyron I adhered the whole piece to my page. LOL so, I just lined up another small scrap piece and cut it off adhering only the top and bottom portion of the scrap with glossy accents allowing me to slide the tag through. I added a small crocheted flower with a silver brad.
close up of the tag....
another tag on the side...
and here is the last tag in the book. I stamped a flourish in elegant eggplant ink from SU (looks black in pic, but looks purple in person) added some white grosgrain ribbon to the top of the tag.
and here is the back of the last tag. I used the paper company studio journal tag. :)
Well, I hope that you have enjoyed viewing the book that I made! I had a lot of fun making it. I forgot just how much work goes into these books!
Thanks for looking!
Keep on Scrappin' and please, be kind to one another!
~Melisa Marie
NOTICE: All images in this post are Copyright of Melisa Marie McConnell, October 2011. You may NOT use my images as your own, for any reason whatsoever, this includes but is not limited to: taking credit for your own work, entering contests and/or challenges, copying images for any use other than personal use as "layout sketch" inspiration. Any infringement of this Copyright will be reported to the proper authorities for fullest prosecution allowed by law.


I really liked the pink one with silver bow... Soo poshy!
ReplyDeleteThanks Gleise!! When I make another of these books, I'm going to do that page 2 times like I did the "note" page. I realized AFTER I made the page how cute it was! :)
ReplyDeleteWow, I'm impressed sista! I love these! Great work.
ReplyDeleteThanks Laurie!! they are a lot of work but always turn out nice! I'm really hoping to get the $35 I'm asking for it!
ReplyDelete