It has been a ROUGH week! So, I was supposed to have back surgery yesterday, but I've been dealing with an impacted wisdom tooth for about 3 weeks now. I went to my dentist monday afternoon and they did an exam and took some x-rays. I have a MASSIVE infection all in the back part of my gums, up into my cheek bone and down in my ear. So, my back surgery has been pushed back to mid November. I'm not happy, but gotta deal with it. I will have my tooth surgically removed next tuesday. I'm not looking forward to that!
Anyhow, since I didn't have to get up with the roosters tuesday morning, I was able to stay up and have some fun with glossy cardstock and alcohol inks. Ok, I lied, so, I actually used glossy photo paper. same thing, right? almost, but not really. LOL
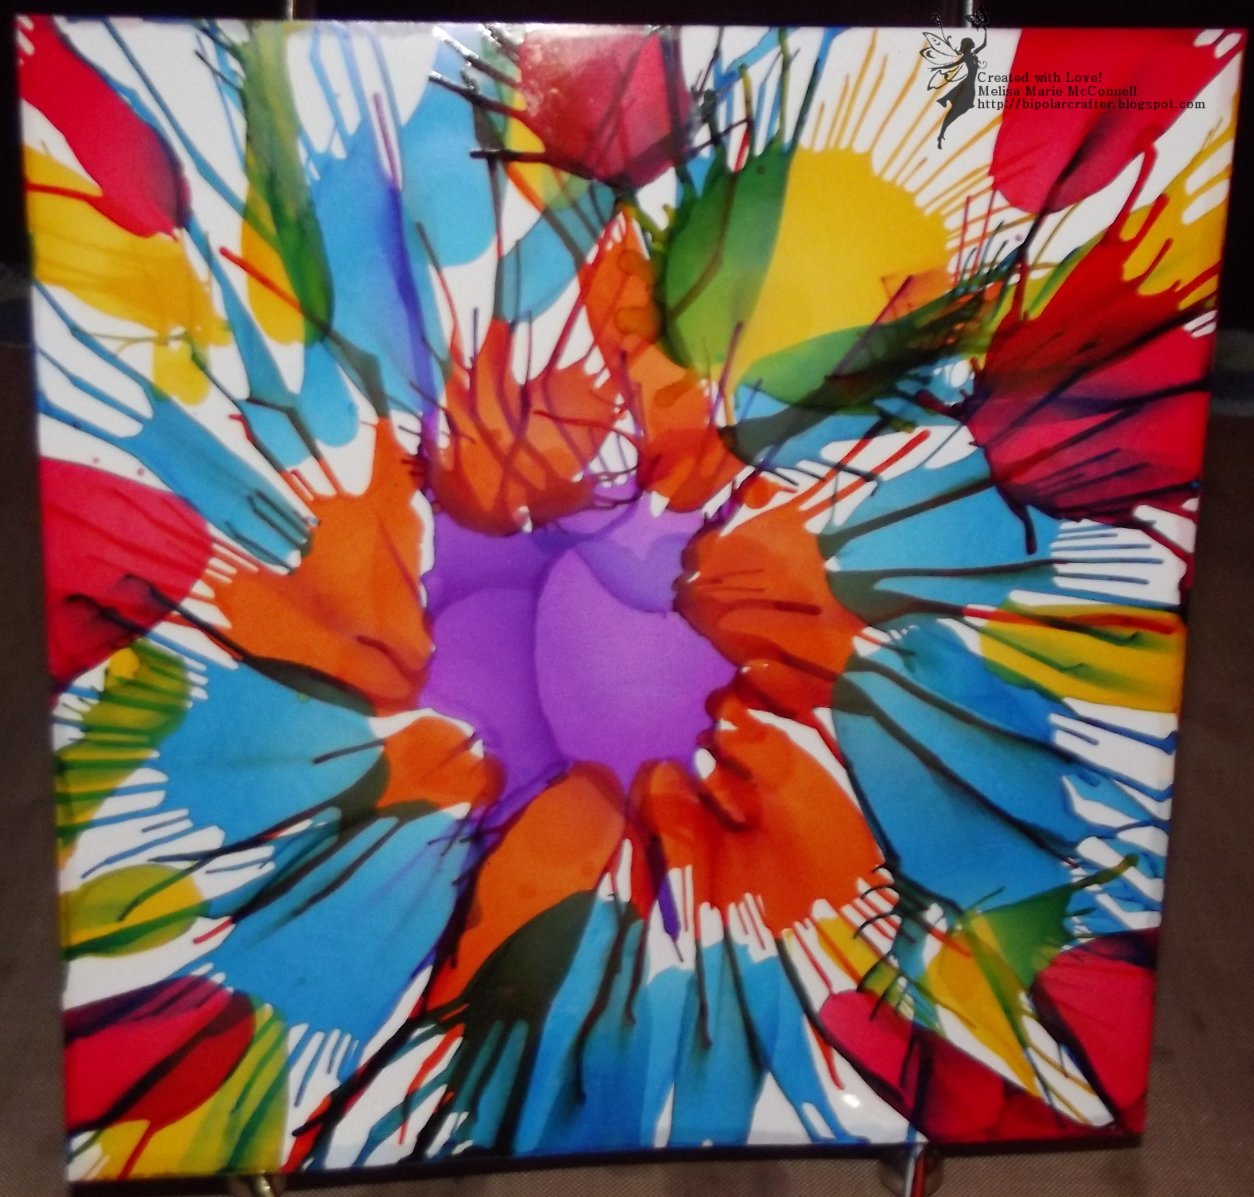
So here is what I came up with. (just one of them, but click below to see the rest). I'm really pleased with how these all came out! :)
So that one is more of an artistic piece rather than an actual background that I'll use. I'm going to make a few more with these same colors and just alternate the order of the colors. :)
Click below to see the rest that I made!
So here are a few other angles of the one above.
As you can see, there is a major glare. these things are REALLY hard to get pics of because of the glossy of the cardstock. I tried to take the pics outside but the glare was even worse on the majority of them.
Anyhow, this one was done by starting in the center with a few drops of the purple and then I would blow it with a straw (actually, a makeshift straw that I made out of a pen because I didn't have any straws), and rotate the cs after each blow. then, I worked my way out of the center adding a new color one drop at a time in a circle, and so on and so forth until I reached the edge of the page. NO blending solution was used on the above background. this is a 5.5 inch by 5.5 inch background (all of the ones I made are this size).
I really LOVE how this one came out! :)
Here are the rest:
I really like this one too. I used 3 different colors of AI and also some blending solution.
The colors change depending on how you turn the cs in the light. really cool! :)
the one below is quite different from the rest because I used 3 colors but I also used the silver metallic mixative and blending solution. you can actually run your hand over the top of the cs and feel the ridges that the layering made. it's really cool!
My favorite pic of this one. :)
So this one was 2 colors plus the blending solution. so neat! I actually made a card with this one and I'll show that in my next blog post. :)
You can see the waves of color from the side!
head on. If you look at the far left, you can see a half circle almost towards the bottom, in the purple. There was actually a "bubble" of liquid when I pulled the cs up off my mat, and it popped, and that's how it made that round circle. pretty neat!
this one was 3 colors plus blending solution. Initially it was only 2 colors and blending solution, but I really didn't like how muddy it looked and there wasn't a lot of variation of color, so I added some green to my mat and some more blending solution and bumped the cs against it.
from the side.
As you can tell, I REALLY like the color blue. LOL this one is 3 colors plus blending solution.
You can't really see the purple, but it's in there!!
Ok so initially I did this one and ended up trashing it because there was SOOOOOO much green that it looked a bloody muddy swamp. haha
So for the one above and below there are 3 colors plus blending solution. I think this came out pretty cool looking on my 2nd attempt with these colors together. :)
So this one is similar to one of the above, but I did the technique differently. It has 3 colors plus blending solution, but does not have the silver metallic mixative in it. for this one. Also instead of just putting the AI and solution on my mat in drops with no specific pattern, I put the drops down and then combined them all together with a craft stick (popsicle stick. LOL). For this one instead of "swiping" the cs through the mixture I turned it over and held it glossy side down and then just bumped it up and down into the mixture.
You can see as if it looks like it were swiped through the mixture, but that's just how the liquid "ran" when it was picked up and turned over. I really like this one! there is a good mixture and you can clearly see all the colors. I know it's difficult on the screen, but these look AMAZING in person! :)
and this last one is another of my favorites out of all the ones I did. 3 colors plus blending solution. It looks so pretty. I took one with the flash on and one with the flash off (top is flash on, bottom flash off). You can drastically see the difference in color tone wihch is actually how it is if you were to hold the cs and turn it in the light. :)
those purples are just so beautiful!
Well, I hope that you like my AI creations. I had a blast doing them. Even tough it stunk up the house and I got a major headache from it, I am very pleased with how they all came out!
Check back soon to see the 2 cards I made using the backgrounds. they came out so pretty. I will post them soon!
Thanks for looking, Keep on Craftin'
~Melisa Marie
Supplies used:
Cardstock/Paper: Kodak Glossy Photo Paper. Ink Pads: None. Tim Holtz Adirondack Alcohol Inks, Tim Holtz Adirondack Metallic Mixatives, Tim Holtz Adirondack Alcohol Blending Solution.
Tools: Cricut paper trimmer, Ranger Inkssentials Non Stick CRAFT SHEET Reusable 15 X 18, Wax Paper, Unscented Baby Wipes


wow WOW WOW!!! Hi, anymore!
ReplyDeleteI love it! Bold colors are my passion and you really know how to use them.
Great Job Melisa!
The second one in greens and yellows are my favorite. Are you going to sell them? 'Cause Im really willing to buy the second one!
Cheers!
thank you my darlin Gleise! I had so much fun doing them! though, my fingers and hands look HORRIBLE. LOL not easy to get this stuff off the skin.
ReplyDeleteHubby told me I should sell them too and I've been thinking about it. I will send you a message on fb about it. :)
*beijos*
I love your ideas. Now to find my straws. All the different colors and textures are really neat.
ReplyDelete@Christina D. Thanks so much. I've been looking online and on the TH blog and such and didn't see anything at all that I liked, so I figured to try out my own ideas to see if they would work.
ReplyDeleteIf you don't have any straws, do what I did! take apart a pen. it's simple and easy. any pen that "clicks" at the top to expose the pen point at the bottom, comes apart, you just have to fuss with it a little to get the top and bottom part open.
I've found that my bic click it was the easiest. :) Hope that helps!!!
If you're going to do one like the top, be careful, you can get light headed and dizzy very quickly with all the blowing.
TFL!! :)
~Melisa Marie
Great job, Melisa. These are really beautiful. The colors are stunning! Can't wait to see your cards.
ReplyDeleteDeanna
I had to pin this!!!!! I hope everyone comes to check it out..you are seriously talented!!!!!
ReplyDeleteThis comment has been removed by the author.
Delete